Nov. 21st, 2020 07:04 pm
[Mahoyaku] Mitile Cannon v1.1

Hi hi! I made this guide primarily to help a friend make their all-999 stats chibi in Mahoyaku, so the language below is... very casual. And very biased. You have been warned! I think making an all-999 parameter chibi is the easiest to do in Bar Bannett, mostly because sweet, sweet Mitile can give 400 parameter x 5 attributes very easily. That's like, half of the battle! The guide below will show you how to get that, and hopefully this would be useful for you too! Let's defeat those event monsters and love our oshis together!
I've written 2 methods to get an all-999 chibi in this guide: 2-biscuits/1 recovery item and 3-biscuits method. The former (2-biscuits) is easier to achieve & less RNG-reliant, but there's less freedom in this method. I recommend this one for newbies. The 3-biscuits method will allow you to make any chibi under the sun, but it's also more mentally frustrating (lol)
Warning: this post is image heavy!
---
To make this guide more structured, I've divided the guide into 5 sections. You can Ctrl+F and jump to the parts that are relevant to your needs:
I. How Does Bennet Work?
II. 2-biscuits Party Formation
III. The Three Phases of Training
IV. Execution
V. The 3-biscuits Method
---
I. How Does Bennet Work?
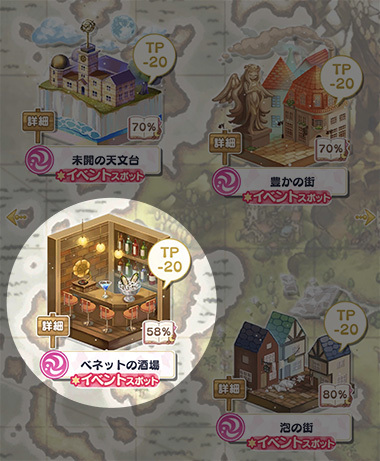
Bennett is the name of Shylock's bar. You can provide hospitality (omotenashi) to the guests and gain various bonuses according to each guests. A few examples of bonuses are: guaranteed great success(大成功)for 2 turns provided by Shylock, partner's favouribility +20 by Nero and of course, sweet sweet +60 all parameter gain that's provided by Mitile. And the best thing is? These buffs can level up and therefore, have their effectiveness increased 8D 8D. Let's have a more detailed look, shall we?
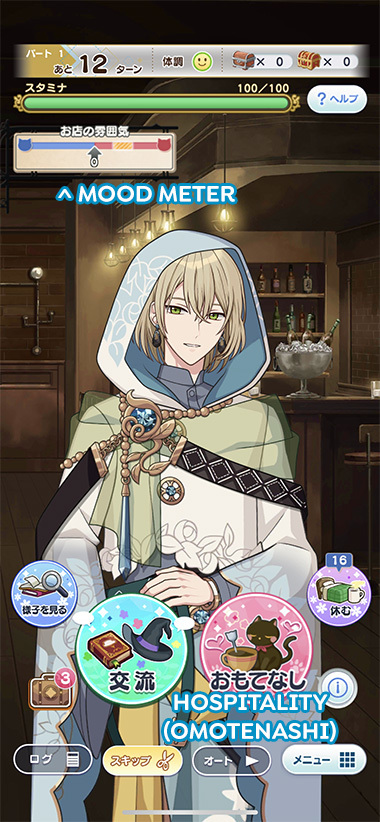
The inside of Bar Bennett
There's a mood meter in this place, which indicates the atmosphere of the bar. Train your chosen wizard accordingly and position the atmosphere (your arrow) inside the yellow area. That's the sweet spot! Once you're there, that wizard can provide hospitality to the guests of your choosing, and receive their buffs. For a full list of all of the buffs and the corresponding characters, please go here.
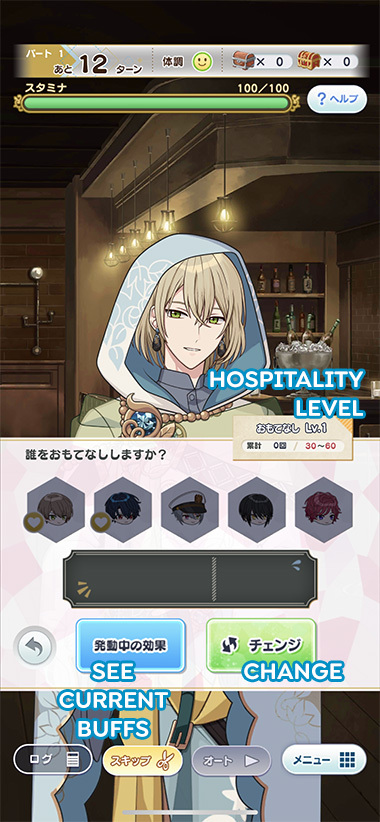
As the wizard continues to provide hospitality to the guests, his hospitality level will go up! The lowest level is 1 while the maximum level is 5. The effects of the buffs will increase according to his hospitality level! For example, Mitile's buff will give +60 to all parameters at lv 1, then +80 at lv 2, +100 at lv 4. Add 2 large biscuits to a lv 4 Mitile and you'll have a +400 increase to all stats! Crazy, right? So what you'd want to do here is: increase your hospitality level to 4 or 5, then provide some really good customer service to Mitile! What a good boy... best son... Bear in mind that the yellow area will shrink as the omotenashi level goes up, making it slightly harder to activate the gimmick.
There's a catch, though; the chosen wizard does not appear in the omotenashi list because... he's the one providing the service!!! LOL. So if you set Mitile as your training partner/main wizard, then Mitile's not gonna appear in the list and therefore you won't get the awesome stat bonus. I'm still a bit sad about this... 'coz I've to train elsewhere that's more tricky. CRIES. Oh well, anything for a strong Mitile...
Another important info: the mood dampens when you rest. Resting will change your position (arrow) towards the left. The amount cycles with each turn: first, it would be within the 10 ~ 19 range, then 20 ~ 29, 30 ~ 39 and lastly it will return to the 10 ~ 19 range again. Keep this in mind when you do the 3-biscuits method. It'll come in handy!
---
II. 2-biscuits Party Formation
Unfortunately, yes, this guide also relies on 3 cards that has Great Success(大成功)cards. The setup that I've used for this guide is:

Rutile looks so happy with his beloved otouto uwooohhhhh QwQ My sweet southern boyes
Which brings us a (rough) total of 24% great success rate and a few lucky attribute increases along the way. Cool beans! You can probably achieve the all-999 goal with lv 100 initial Mithra as well (Great Success +10% & Pride +70%) but I like to... gamble and get lucky with VoxNox... Because when his skill activates at the right timing, Mitile's omotenashi can give us 680 parameter increase. It rarely happens, but when it does, it feels awesome.
Ahem. Moving on,
---
III. The Three Phases of Training
As I've explained before, it is crucial for us to time the activation of Mitile's omotenashi. The recommended opportunity to activate it when our hospitality lv is at 4. After getting the stat increase, we finish off everything by doing normal training. Therefore, the training phases are as follows:
Part 1 & 2 should be dedicated to increasing your wizard's hospitality level. Prioritize delivering as many omotenashi as you can and get the buffs that your party needs! For example, if your cool is lacking, then get the buff which increases cool acquisition. Your hospitality/omotenashi level should be at 4 or 5 by the time part 2 ends. Once your omotenashi level is at 4 (which should happen in early Part 3), muck around and activate Mitile's omotenashi because it's a bit tricky: it can only activate when your main wizard is injured. That's to say, uh. We need to... deplete their stamina to 0, make him cry/blush while landing on the sweet spot. Tricky!!
Remember to use up your items BEFORE you activate Mitile's omotenashi! After he delivers the stats increase, all we have to do is train normally, pray for your Great Success cards to work and raise the rest to 999.
Let's take a look at how it's done!
---
IV. Execution

We are not able to provide hospitality to the guests at the wrong mood
Our initial atmosphere is... neutral. Oh look, the perfect atmosphere is nearby, yay. Select your training menu according to the sweet spot and activate the omotenashi! You can preview which-training-session-adds-what by selecting them. Tap the button again when you're sure! No need to care about stat distribution at this point -- just increase your hospitality level!


When the icons light up, that means you can provide some customer service
Mitile appears really early!! Alas, his omotenashi effect can be better later on, so let's acquire other stuff in the meantime. Like Shino's, which "adds +10 pride when training pride". The permanent buffs are really nice, but you should still keep in mind what your party lacks! For example, if your relax-training level is 1, try to get Murr or Rustica & increase it! In addition to increasing omotenashi level, the secondary goal here should be to get the training level to at least 3 for all attributes, imo.

Result at the end of Part 1
The end of Part 2 is gonna look slightly less pathetic than that, because our goal is still the same: raising omotenashi level.


By the way, if you don't bring a Mitile with you, his omotenashi is gonna cost a whooping 60 stamina
With some luck, I managed to get the omotenashi level to 4 by the end of Part 2. The tricky part begins now!!! As I've explained before, Mitile's omotenashi activates only when 1) you are at the perfect atmosphere and 2) your wizard is injured. This... is purely RNG at work. You can take as few as 2 or as many as 7 turns to fulfill these 2 conditions. The RNG was pretty brutal to me, and it took 5-6 turns to injure Rutile and land on the omotenashi spot at the same time. Rutile worked very hard with Mitile around and avoided many of my sabotaging attemps. Oh nii-sama... I'm so sorry (TT__TT)

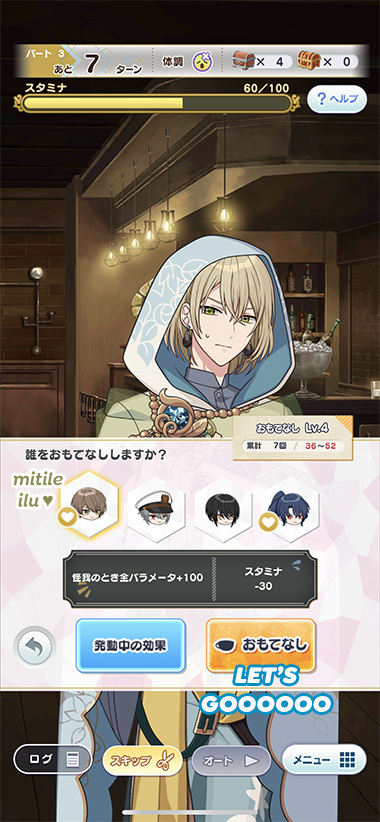
Eat your snacks and LET'S GOOOOO
Once the conditions have been fulfilled, eat your ramen to recover some stamina (or as needed), consume your biscuits and provide the best customer service to our sweet boy here!
[ By the way, I see a lot of JP users bringing 3 large biscuits to Bennett. It's possible, and you'll get (600 parameters x 5 attributes) increase instead but... it's. Terribly difficult. More info down below.]

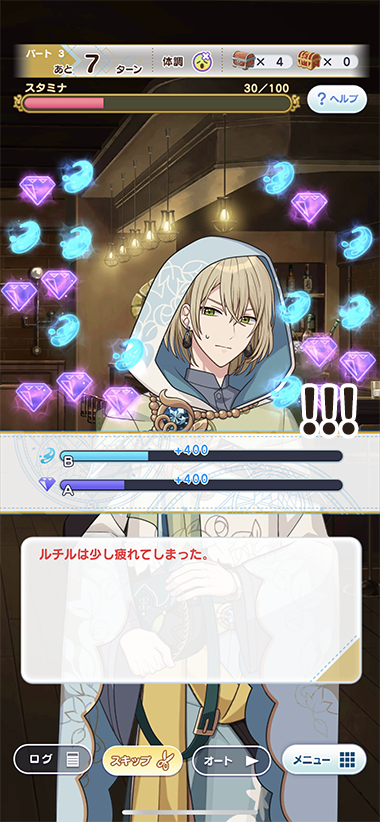
Voila!
Oh... VoxNox didn't happen. Lemme. Have a moment of silence....
But yeah!! Easy 400 stats x 5 attributes!! All hail Mitile!!! \<<
Then you can raise the other stats to 999 by training normally. No need to care about omotenashi and stuff by now -- your Great Success cards should be activating left and right! And by that, I mean, every 3 turns. It's also still a good idea to activate Shylock's omotenashi whenever you see him!
At the end of Part 3, your stats should look like this!
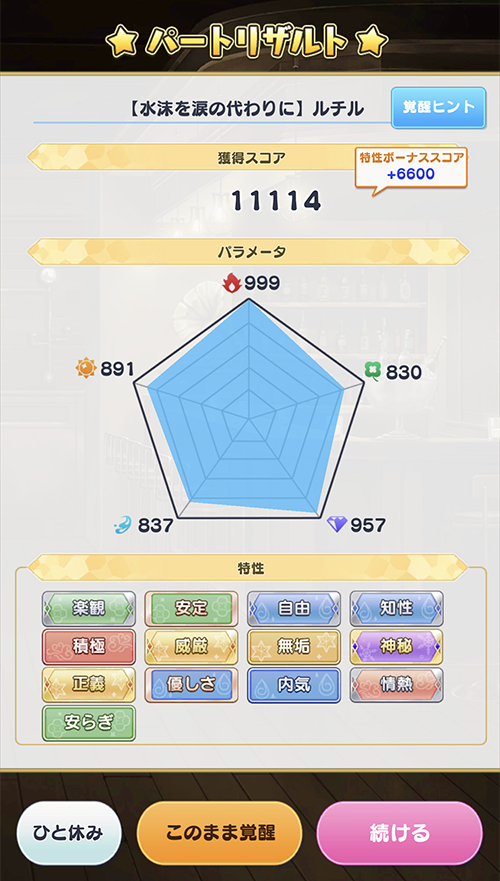
End of Part 3
Continue to train normally and get those sweet 999 parameters.
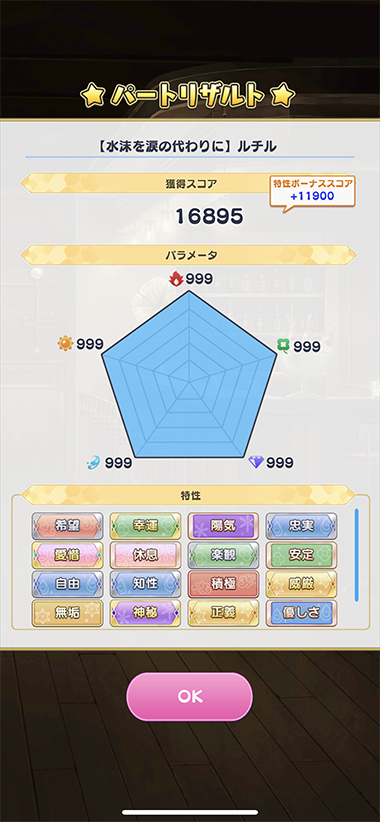

Ta-daaahhh
All 999!!!
---
V. The 3-biscuits Method
The 3-biscuits method is what high-level players use to make any chibis have 999 status without any daiseikou card. The principles are the same; get your omotenashi lv to 4, injure your wizard, recover stamina, eat 3 large biscuits and activate Mitile's omotenashi to get +600 parameters to all attributes. Pulling this off requires a different set of strategy; it's more brainy! And the chances of pulling it off is low too (20% ~ 60%). I can generally pull it off once every 3 tries. Don't get discouraged and read on, tho; this knowledge would most likely come in handy later.
Key strategy:
There is a way to recover your wizard's stamina without any items. When your wizard is injured, there's a slim chance that they would refuse to train and rest instead. So after your wizard's injured, keep on training until they refuse to do so and recover some stamina. The trick is to gather sufficient stamina and land at the perfect atmosphere where Mitile's around. It sounds simple, but this is terribly tricky to do and uh, you'd need 2 parts or more to pull it off.
Cain is a recommended party member in this strategy. You'd want to get the omotenashi level to 4 as soon as possible, which can be done with the help of Cain. Stash him into your party! When the training starts, you can increase the omotenashi lv to 2 by normal means. Then refresh/CHANGE「チェンジ」 the omotenashi list (as needed) & activate Cain's omotenashi to raise it to 4. This can be done within the first part if you're lucky. It would also leave a good 3 parts to see-saw through the bar's gimmick, so having Cain around is really beneficial. You can still get all-999 even without him, tho. It made things more difficult, but it's very possible /o/
Note: I do not recommend activating Cain's omotenashi at lv 3. When it succeed, your omotenashi lv would rise up to 5. At that level, the yellow area is gonna be super small, making it harder for you to land on it. The optimum opportunity to activate Mitile's omotenashi is 4 unless you're super pro at this...
Next comes the crucial step!! There's really no one way around this but pray for the RNG to be kind to you, but there are several tricks that may help in achieving points (5)~(7).
(a) Make the yellow spot appear near the edges
When you're away from the perfect atmosphere, a green CHANGE「チェンジ」button will appear on the gimmick menu. Selecting the CHANGE button will allow you to refresh the omotenashi list and relocate the yellow spot. There are 2 strategic locations to place the yellow spot in: each near the end of the corners. Preferably within 1 turn's range away from each corner, which is usually between 25 ~ 40 pts. This way, you can injure/recov/train all the way to each corner and move back/front once when the conditions are right.
The CHANGE button can also be pressed when you want to make Mitile appear. He's often away from the omotenashi list, so make sure you confirm that he's around else your efforts will be wasted. Admittedly, I am guilty of forgetting to double-check this numerous times... lol
(b) Injure your wizards 1 step away from the perfect atmosphere, then train
Injure your wizards at 1 step away from the yellow area! Then proceed to train towards the yellow spot and pray that your wizard... would rest & recover some stamina. After he's rested, train & move towards the yellow spot, eat your biscuits and activate Mitile's omotenashi.
By omotenashi lv 4, your mood variants are roughly at +20, +35, +45, -25 and -45. You may land anywhere within those range, but my personal recommendation is positioning yourself between -20 ~ -30 range. That way, you'd have 2/5 options to land yourself on the yellow spot!
(c) Injure your wizards within the perfect atmosphere, then train
In the event that (b) fails and you are at the yellow spot without sufficient stamina, not all hope is lost. Hover anywhere 1 step away from the yellow spot and pray that your wizard would rest. Move towards the yellow spot, eat your biscuits and activate Mitile's omotenashi.
(d) Injure your wizard 1 step away from the perfect atmosphere, then rest.
Your wizards have small chance of staying injured after resting. This option relies on that probability. Here's how it works: your wizard is 1 step away, at the right side of the yellow spot. Rest and land the wizard on the yellow spot. If he's still injured, eat your biscuits and activate Mitile's omotenashi. Otherwise... well, try again! Wizards usually recover right after resting (especially Oz) so imo this is the least reliable. But it might also work. It worked for me a few times.
Ultimately, we're playing with RNG so there's no one true way of doing this!
After activating Mitile's omotenashi, watch the numbers roll and do the usual. Get those traits you require and watch the magic unfold.
I highly recommend practicing this method by using 3 small biscuits first! Once you've got the hang of it, feel free to bring 3 large biscuits and attempt it seriously.
For a full guide of the 3-biscuits method, please see this post instead.
---
Welp, that's the end of this guide. Hopefully this method would work for you! Mitile is so cute! Give him lots of head-pats and corn soup after the training!
Tags: